
Using Craft StateMachine
 Optimizing the scene Optimizing the scene
It’s wise to optimize the scene before starting to recording the animation. The scene is optimized by decreasing the amount of polygons shown during the recording. This is achieved by hiding objects not crucial to the part of the scene to be animated. Another tip is to use Craft Bounding Poly, which temporary lowers the amount of polygons for selected objects and allows for a smoother recording. |
- Create a Craft StateMachine.
- Configure the controls for Craft StateMachine.
- Select StateMachine in the tool tree list and click on the Input Settings button in Craft Director Studio’s main window. This will open the Input Settings window for Craft StateMachine.
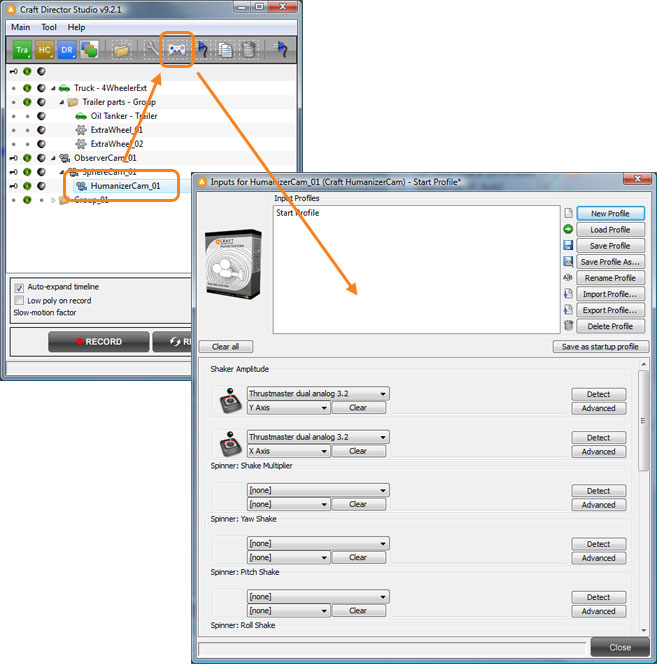
- Select StateMachine in the tool tree list and click on the Input Settings button in Craft Director Studio’s main window. This will open the Input Settings window for Craft StateMachine.
- Optional: Align and link/parent the RelativeCage mesh to the machine/system.
- Align both the CurrentState and 01WantedState to the moving machine/system element (initial state).
- Link/Parent the element to the CurrentState dummy.
- Position the rest of ##WantedState meshes to the corresponding system states.
- Click Record in Craft Director Studio’s main window to start recording.
- Use the Input controls you’ve configured to switch between the different states.
- Click Stop to stop the recording.
Input settings
01WantedState
This button will send CurrentState to 01WantedState.
02WantedState
This button will send CurrentState to 02WantedState.
03WantedState
This button will send CurrentState to 03WantedState.
04WantedState
This button will send CurrentState to 04WantedState.
05WantedState
This button will send CurrentState to 05WantedState.
06WantedState
This button will send CurrentState to 06WantedState.
07WantedState
This button will send CurrentState to 07WantedState.
08WantedState
This button will send CurrentState to 08WantedState.
09WantedState
This button will send CurrentState to 09WantedState.
10WantedState
This button will send CurrentState to 10WantedState.
Spinner…
Spinners enables the change of parameter values with an input controller in real-time.
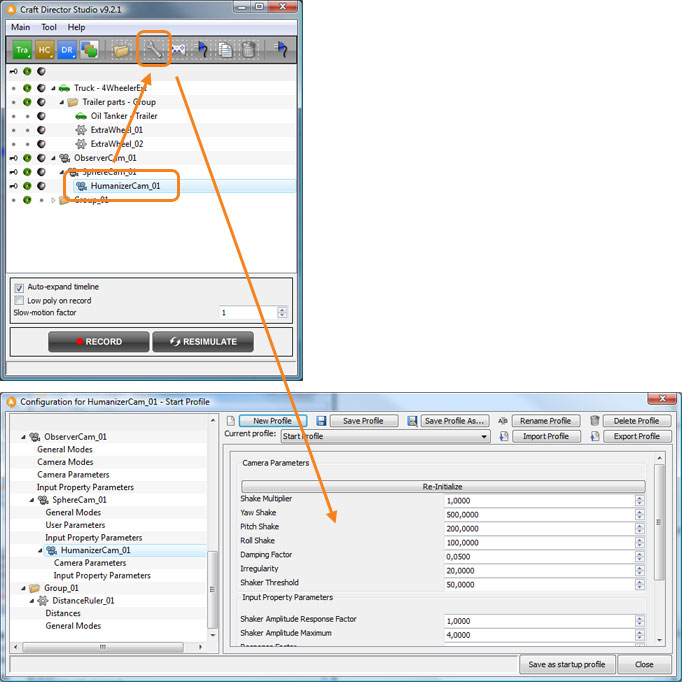
Configure
General Modes
Hide Helpers
Hides the Helpers.
Hide Helpers During Recording
Hides the Helpers during recording.
StateMachine Parameters
Use Simplified Settings
When checked the below settings will override the settings in the ##WantedState groups under them.
Maximum Linear Velocity (units/sec)
Sets the maximum speed of the CurrentState mesh. 0.0 will switch off the limiter.
Maximum Rotation Velocity (Degs/sec)
Sets the maximum angular speed of the CurrentState mesh. 0.0 will switch off the limiter.
Linear Response Factor
The smaller the value the softer the CurrentState approaches the states. A value above the scene FPS will yield an instant jump to the chosen state.
Rotation Response Factor
The smaller the value the softer the CurrentState approaches the states. A value above the scene FPS will yield an instant jump to the chosen state.
##WantedState
Maximum Linear Velocity (units/sec)
Sets the maximum speed of the CurrentState mesh. 0.0 will switch off the limiter.
Maximum Rotation Velocity (Degs/sec)
Sets the maximum angular speed of the CurrentState mesh. 0.0 will switch off the limiter.
Linear Response Factor
The smaller the value the softer the CurrentState approaches the states. A value above the scene FPS will yield an instant jump to the chosen state.
Rotation Response Factor
The smaller the value the softer the CurrentState approaches the states. A value above the scene FPS will yield an instant jump to the chosen state.